Try This Easy 10-Minute Office Makeup Tutorial

Today, I’m going to show you an easy office makeup routine that helps you look polished without spending your whole morning getting there.
This routine is all about efficiency, multitasking products, and enhancing real skin. Let’s get started.
Upstyle Recommends!
Tools and materials:
- Hydrating milky toner
- Hydrating lip balm
- Jade roller (chilled in ice)
- Skin tint with SPF
- Foundation
- Complexion brush
- Damp beauty sponge
- Peach color corrector
- Concealer
- Cotton swab
- Contour stick or bronzer stick
- Brow pen for hair-like strokes
- Clear brow gel
- Setting powder
- Triangular powder puff
- Diffuser brush
- Fluffy crease brush
- Pencil brush
- Eyeliner
- Angled brush
- Mascara
- Cream blush suitable for cheeks and lips
- Blush brush
- Lip liner
- Optional lip gloss or balm
- Setting spray
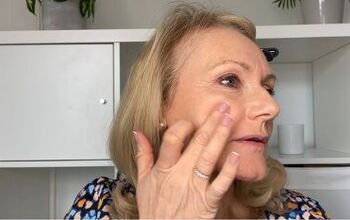
1. Skin Prep
I like starting my routine by applying some kind of hydrating, milky toner. This is a great way to add a ton of hydration to the skin without any greasiness or heaviness.
I also like applying a hydrating lip balm to prep the lips for later.
On really puffy mornings, I chill a jade roller in ice and sweep it under the eyes and out toward the edges of the face. Doing this for even a minute or two brings the puffiness down and helps me look more awake.

When it comes to moisturizer, choosing something multifunctional makes the whole routine much faster.
For skincare, I’m using a tinted product that combines skincare, SPF, primer, and a tinted serum all in one step.
I apply it liberally with my fingertips all over the face, including under the eyes. It evens everything out softly and gives me a nice, smooth base to build on top of.

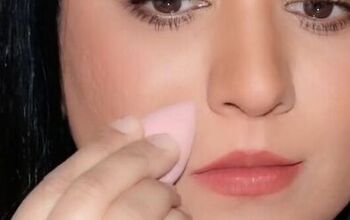
2. Foundation
Next, I even out the complexion. I like to put my foundation on the back of my hand first and pick it up with a complexion brush. Doing it this way gives a softer, lighter application overall.
Where I want a little more coverage, I use stippling and pressing motions, especially through the center of the face or anywhere I have breakouts.
Wherever I want the coverage to look sheer and natural, I sweep or swirl the brush instead.

Once the base is on, I go over everything with a damp beauty sponge. This smooths out the finish, presses the product into the skin, and lifts away any excess product sitting on top.

It was really important to me that you can visibly see that I have pores, breakouts, lines around my eyes, and texture when I express emotions and happiness.
That is all completely normal. Please be gentle with yourself when you look in the mirror!

3. Concealer
For concealer, I always start with a peach color corrector, but only on the areas where I have true depth and very blue undertones.
If I put concealer directly on top of that darkness, it turns ashy and the circles still show through.

Once the corrector is blended using soft stippling motions, I go in with concealer to brighten. I like to connect the under-eyes to the upper cheek area and lift from the outer corners upward.
I let the concealer dry down for about 30 seconds before blending it out. Letting it dry gives much more coverage and much less creasing.

If you have a lot of crow’s feet at the outer corners, avoid placing concealer directly over them.
I also place a small amount of concealer on the eyelids to even out discoloration. Just make sure to set that area with a little powder, since it’s very prone to creasing if left unset.

4. Contour
Now I add a little dimension to the face. I like using a contour or bronzer stick on the forehead, along the cheekbones, and lightly on the jawline.
Once the color is placed, I blend it out using a mix of pressing and sweeping motions until everything looks soft and natural.

If any area looks heavy or patchy, I go over it with a damp beauty sponge using deep pressing motions. This smooths everything out instantly. I like to give everything a little time to dry down before setting.

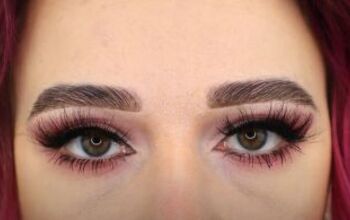
5. Brows
While we wait, I move into brows. Lately, my favorite way to do brows is by sketching in hair strokes instead of shading the entire brow. It looks much more natural.
I always start in the middle of the brow and work toward the tail, using very light pressure. When I get to the front of the brow, I keep the pressure extremely soft and just fill in small gaps.

Once I’m happy with the shape, I brush a clear brow gel through to hold everything in place all day.

6. Powder
Now that everything has had a moment to dry down, we can set the makeup. Setting powders are amazing for pore blurring and longevity, so don’t be afraid of them.
I focus most of my powder on areas with larger pores, mainly the inner cheeks. I use a triangular powder puff and press the powder into the skin.
You can see how quickly the pores blur when applied this way. I also press a little powder onto the center of the forehead and the chin for shine control.

My under-eyes can get very dry, so for that area I use a diffuser brush and sweep very light amounts of finely milled powder just to prevent creasing.
If I notice creasing has already started, I gently remove excess concealer with a cotton swab before moving on.

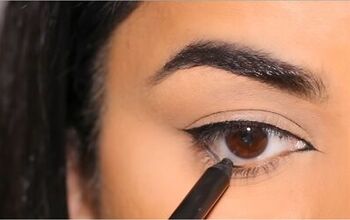
7. Eyes
I take a fluffy crease brush, pick up the same contour or bronzer used on the face, and sweep it across the entire lid and into the crease. Using a pencil brush, I apply the same color under the lash line.

Next, I take a deep brown eyeliner and apply it to the outer corners of the eyes. Before it sets, I smudge and stretch it with an angled brush.
Instead of doing a full wing, I gently pull what’s already there toward the temple and soften the edge with a fingernail.

I finish by applying several coats of mascara to both the top and bottom lashes.

8: Blush
For cheeks, I like using another multifunctional product that works on cheeks, lips, and even eyes. I apply the matte side to the back of my hand, work it into a blush brush, and press it into the cheeks.
As I’ve lost some fat around the eyes with age, I take the blush slightly higher than I used to, melting it into that area to soften the transition and create a more seamless lift.
I then sweep the same shade across the lips for a quick, tonal look.

9. Lips
To add a little more pout, I lightly sketch out the cupid’s bow and the center of the bottom lip with a liner. This step is completely optional!
Do whatever makes you feel most comfortable and most like yourself. If you like extra moisture, you can add a touch of gloss or balm on top to finish.

10. Setting Spray
This final step is optional, but a setting spray is a great way to keep your makeup on all day.

Easy Office Makeup Look
And here is the finished look!

Let me know what you think in the comments down below. I hope you find this quick, easy, and perfect for busy weekday mornings.
Next, learn How to Clean Makeup Brushes and Sponges.
The author may collect a small share of sales from the links on this page.


Comments
Join the conversation