Mature Skin Makeup That Doesn't Look Like Makeup

We need to talk about mature skin. Are you tired of your makeup looking cakey and creasing in the fine lines? You don’t need much makeup to achieve a more polished, but still natural look.
Upstyle Recommends!
Tools and materials:
- Moisturizer
- SPF
- Silicon-based primer (optional)
- Skin tint
- Concealer (one shade lighter than your neck)
- Foundation stick (one shade darker than your skin)
- Cheek tint cream
- Setting powder
- Small powder brush
- Eyebrow spoolie
- Eyebrow filler or pencil
- Small eyeshadow brush
- Eyeshadow (one shade deeper than your skin tone)
- Small fluffy brush
- Black eyeliner pencil
- Mascara
- Lipliner
1. Prep
Start by moisturizing your skin and applying some SPF.
Do this with your fingers. Using your fingers allows you to use less product, which, in turn, prevents caking and creasing once makeup is applied.

Go in with a little extra pressure on those fine lines and dry patches. I would skip a primer, but if you want to use a primer, use a silicon-based primer.

Mix some skin tint with moisturizer on your fingertips and then apply that to your face. It gives a subtle glow while covering up most of the spots and blemishes.
When choosing a skin tint, match the shade on your face to your neck color. Then there is no need to apply it to the neck. Again, we’re aiming for minimal makeup.

Apply concealer to dark areas, matching your concealer shade with your skin tone. If you go any lighter, it will look ashy. You can use it to spot correct.
Apply without blending, then let it sit for a couple of minutes before blending it out a bit.
2. Adding warmth and dimension
Let’s bring some warmth back into the face with a foundation. Use one that is one shade warmer than the shade of your skin.

Use it on your cheekbones, on the sides of your nose, jawline, and forehead.
A foundation stick is lighter than a contour stick. This will help keep the look more natural while still adding some dimension.
Now take a cream cheek tint and put some on the back of your hand.

Then use your other hand to blend it out a bit, and then apply it to the apples of your cheeks.
3. Set
Set your face lightly with powder. Take a lightly sifted setting powder with a small powder brush. Focus your applications on areas that might move or crease.
For me, that’s mostly in my T-zone. Again, this keeps overall products minimal and allows the foundation to continue to shine through.

4. Brows
For my brows, I use a spoolie to brush my brows upwards.

Then I fill in just the sparse areas with a brow pencil. Never fill the innermost part of the brow if you’re going for a more natural look.
5. Eyes
For the eyeshadow, choose a shade that is a shade deeper than your skin tone. Use a small brush to blend that into the socket area.
Then, blend it out. It adds just a little bit of color and enhances definition in the crease, which wakes up our eyes.

Dip a smaller fluffy brush in the same eyeshadow. Use it to define your lower lash line.
Next, take a little bit of loose powder. You can use any brush, but I’m using a small blending brush. Simply brush it over the inner part of the lid to brighten up your eyes.

Use a black eyeliner pencil and draw on the upper water line. This lifts the eye.
Finish up with some mascara. Usually, I would apply to both the top and bottom lashes, but for this look, I just do the top lashes to keep it more natural.

Here’s a fun tip. Apply your mascara just to the tips of your lashes. This way, you don’t weigh it down from the root.
6. Lips
You can use a lipliner for lipstick. Scribble it on at the center of the lips.

Then smudge it in, blending it out with your finger.
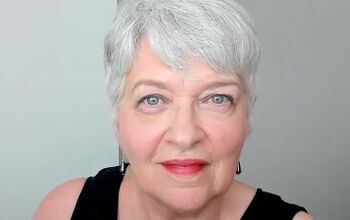
An easy makeup look for mature skin
Check out these before and after photos:


This minimal look is the perfect way to upgrade your natural beauty. It’s also the perfect way to prevent creasing and caking.
Give it a try and leave me a comment to let me know what you think.
Next, try these 5 Quick Makeup Fixes for Dark Circles Under Eyes.
The author may collect a small share of sales from the links on this page.





















Comments
Join the conversation