Try This Easy, Flawless Base Makeup Hack

Want a smooth, polished makeup base without it looking heavy or cakey?
This technique uses thin layers, strategic blending, setting powder and a simple tissue trick to remove excess product and leave the skin looking flawless.
Tools and materials:
- Skincare or moisturizer
- Foundation
- Concealer
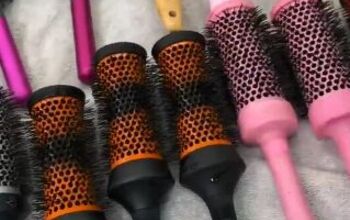
- Assorted brushes and makeup sponge
- Cream contour or bronzer
- Cream blush
- Finishing powder
- Setting spray
Table of contents
- 1. Prep your skin
- 2. Apply a thin layer of foundation
- 3. Build coverage where you need it
- 4. Apply concealer
- 5. Add cream contour
- 6. Blend the contour
- 7. Add cream blush
- 8. Blend everything together
- 9. Set the base with powder
- 10. Use the tissue hack
- 11. Repeat around the face
- 12. Mist with setting spray
- 13. Press everything into the skin
- 14. Finish the makeup

1. Prep your skin
Begin with clean, moisturized skin. Apply your usual skincare and allow it to absorb before starting your makeup.
The goal is to create a smooth, hydrated surface without leaving the skin excessively wet or greasy.

2. Apply a thin layer of foundation
Use a foundation brush to apply a light layer of foundation over your face. Start around the centre of the face and blend outward, keeping the layer as thin as possible.
3. Build coverage where you need it
Rather than applying a thick layer everywhere, add a little more foundation only to areas that need additional coverage.
Blend carefully so the foundation remains even and natural-looking.

4. Apply concealer
Place concealer under the eyes and on any areas that need additional coverage.
Use a small brush to blend it into the surrounding foundation without disturbing the base underneath.

5. Add cream contour
Apply a small amount of cream contour or bronzer to the areas where you want definition, such as beneath the cheekbones, along the jawline and around the edges of the face.

6. Blend the contour
Use a brush to blend the contour into the foundation with gentle strokes.
Keep the product concentrated where you want the definition rather than spreading it too far across the face.

7. Add cream blush
Apply cream blush to the cheeks and blend it upward and outward.
Using cream products before powder helps the colour look more integrated into the base.

8. Blend everything together
Take a clean, soft brush and lightly blend around the face to make sure there are no visible edges between the foundation, concealer, contour and blush.

9. Set the base with powder
Pick up a small amount of setting powder with a fluffy brush.
Lightly apply it over the areas that tend to become oily or where you want additional staying power. Avoid piling on too much powder.

10. Use the tissue hack
Take a thin tissue and gently hold it against sections of the face. Use your powder brush over the tissue to remove some of the excess product and oil without completely stripping away the makeup underneath.
11. Repeat around the face
Move the tissue to different areas, including the cheeks, around the mouth and forehead.
Lightly press or brush over the tissue rather than rubbing the skin. This helps take away excess makeup while keeping the base intact.

12. Mist with setting spray
Once the powder is applied, lightly mist the entire face with setting spray.
This helps take away some of the powdery appearance and brings the layers of makeup together.

13. Press everything into the skin
Use a damp makeup sponge to gently bounce over the face. Concentrate on areas where the makeup looks particularly powdery or heavy.
The sponge helps press the products into the skin for a smoother, more natural finish.

14. Finish the makeup
Complete the rest of your makeup as desired.
The finished base should look smooth and even, with the contour and blush still visible but seamlessly blended into the skin.

And that’s the flawless-base hack!
The key is to use thin layers, remove excess product with the tissue technique, and finish by pressing everything into the skin with a damp sponge.
The result is a smoother, more natural-looking base that doesn’t appear overly heavy or cakey.
The author may collect a small share of sales from the links on this page.













Comments
Join the conversation