This Dot Method Makes Winged Eyeliner Easy for Beginners

Hey guys! I’m going to show you how to do winged eyeliner for beginners. Winged eyeliner can be intimidating for some, but this method makes it simple enough for anyone to do.
Tools and materials:
- Black cream eyeshadow/black lipstick
- Round-tip Q-tip
- Pointed Q-tip
- Black eyeliner pencil
- Glittery pale pink eyeshadow
- Eyelash curler
- Mascara primer
- Mascara

1. Making dots
Start with a round-tip Q-tip and put some black cream eyeshadow on the tip. Use the Q-tip to make a dot at the outer corner of the eye.
Then apply another 2 dots along the top lid with the 3rd dot at the center of the top lid. Make 3 dots along the lower eyelash line, again with the 3rd dot at the center of the lid.

2. Connecting the dots
Swap to a pointed Q-tip with some black cream eyeshadow on it. Use the pointed tip to help you start making the wing. Don’t worry. There is no need to be neat about it.

Continue using the pointed Q-tip to start shading all along the lash line, connecting the dots to help you create the shape.
This method ensures you’re not applying too much product too soon, because you can always add, but removing is more difficult.

The idea here is to completely frame the eye, so use the Q-tip to start smudging the color towards and around the inner corner of the eye. Use the tip of the pointed Q-tip to create a V-shape around the inner corner of the eye.

3. Shape your wing
Flip your cotton bud to the clean side to manipulate the shape of the wing. Use the tip to pull out a sharper wing.
Use the body of the Q-tip to blend along the lash line.
You can also use the thicker part of the Q-tip to wipe away any product you don’t need. You can use makeup brushes for this also, but this technique is so simple that all you really need are Q-tips.

4. Framing the eye
Use a black eyeliner pencil to fill in both the top and bottom waterline. Go all the way to the inner corner. This is going to frame the eye beautifully.

Use the end of a pointed Q-tip with some eyeliner on it and use that to deepen the color in the inner corner of the eye.

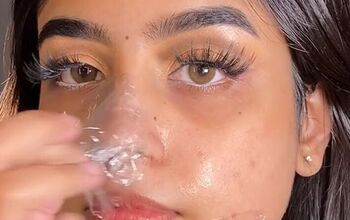
5. Eyeshadow
You can use your finger to apply some glittery pale pink eyeshadow to the lid. This helps set the cream in place. It also hides any imperfections and blends the colors of the eyeshadow and the wing.
You can also use your finger to apply a bit of the glitter eyeshadow at the inner corner of the eye. Afterwards, go back in with your black eye shadow cream and start building it up until you’re happy with the intensity of the color.

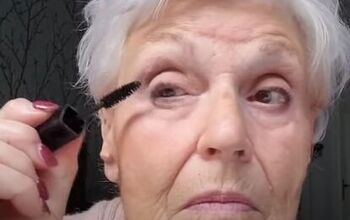
6. Lashes
Curl your lashes and apply some mascara primer to your upper lashes. This will help your lashes look a bit thicker and fuller. Then apply the mascara.

Apply mascara to the lower lashes, without any primer underneath.

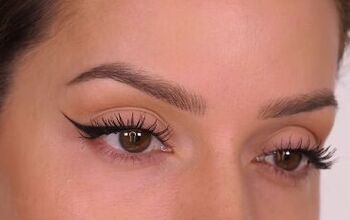
How to do winged eyeliner for beginners
This is the perfect winged eyeliner for beginners. The technique is straightforward and fuss-free. Leave me a comment to let me know what you think.
Next, check out this Easy but Glamorous Copper Eye Makeup Tutorial.
The author may collect a small share of sales from the links on this page.


Comments
Join the conversation