How to Create a Glamorous Makeup Look for Hooded Eyes in 5 Minutes

Hi, everyone! Today, I’m going to do another step by step makeup for older hooded eyes tutorial. This is another look that should take you just under 5 minutes and I’ll be sharing some of my favorite makeup tips for hooded eyes! Let’s get started.
Smooth under eye puffiness and wrinkles!
Tools and materials:
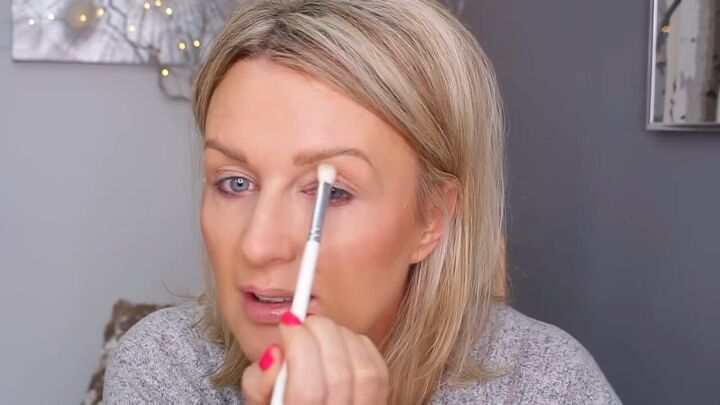
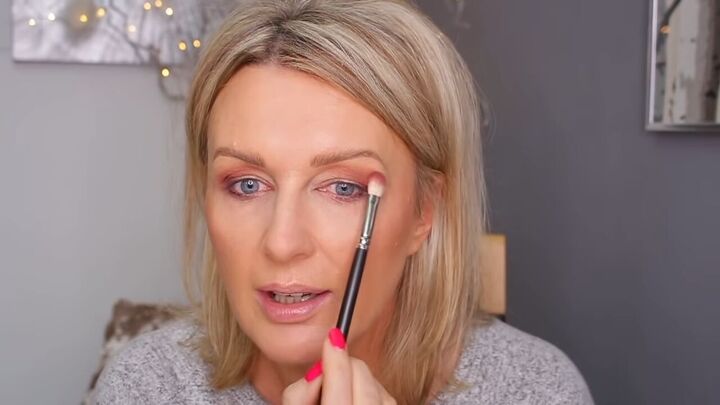
1. Apply transition shade above the crease
I’m putting the transition color above my crease because, with hooded eyes, the crease is where your top lid falls over your mobile lid. My crease is really low, so if I put eyeshadow there, you’ll never see it. When doing eye makeup for hooded eyes, the higher you put your transition color, the better.
I lift my eyebrows high to stretch my lid so I have more space to work with, but you can physically lift your brow with your finger if you can’t do it naturally. When you drop your lid, you should still be able to see the color.

If you have downturned eyes as I do, apply the shadow higher on the outer portion of your eye where your eye droops so you lift the droopiness.
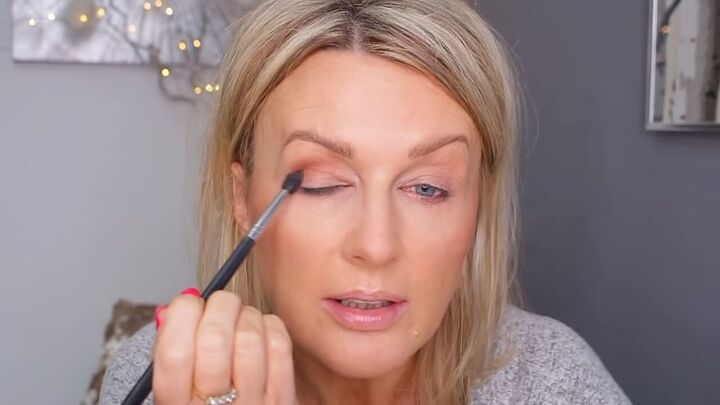
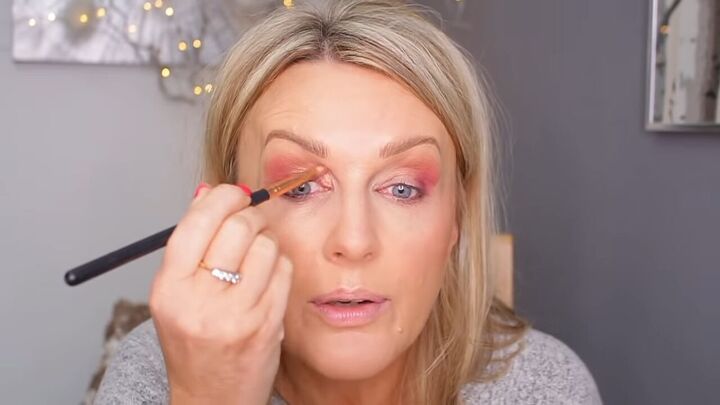
2. Deepen your crease
Start deepening your crease with your second and third colors which are darker shades than the first. Only concentrate on the outer edge and halfway down your crease. This should start to shade and create your outer/or reversed seven. This is a concept I made up to explain how to do makeup on hooded eyes, but it’s essentially the outer V, but on hooded eyes.

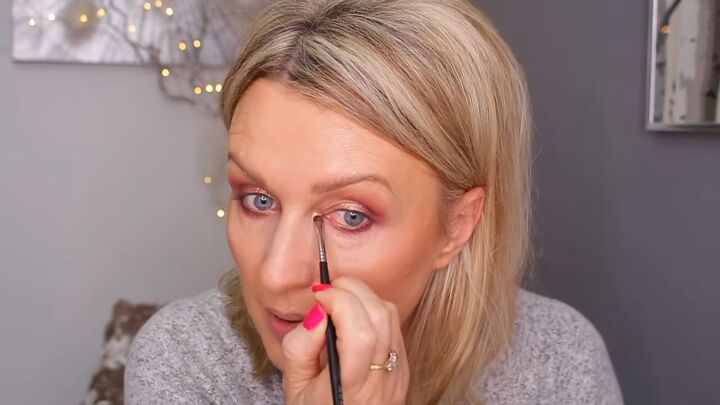
3. Apply eyeshadow to the outer V
Now, I’m choosing a lovely purple color and I’m just going to pat it in. I’m being conscious that I’m making that seven shape. Patting works much better when you’re doing more precise work on your natural eyes. Sometimes when you go in with a wiping motion, the skin keeps moving and it doesn’t look as good.
Again, I’m dragging it into the crease but not too far.
I’m also going to add more color at the top so the shade is a bit higher and it lifts the outer portion of my eyes. This is especially good if you have downturned eyes.
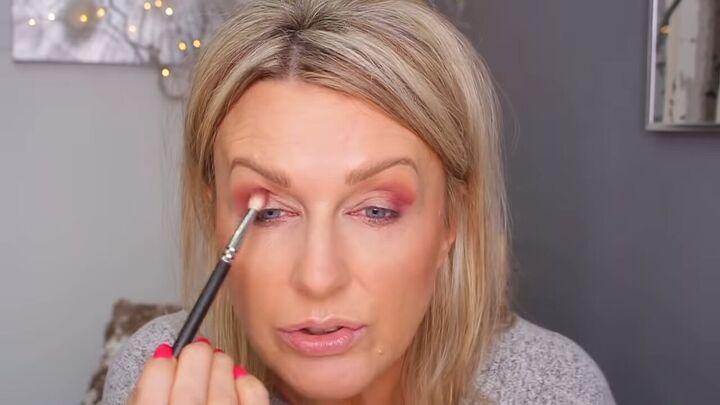
4. Apply shimmery eyeshadow to your mobile lid and inner corner
Use any flat synthetic brush like a concealer brush, because they pick up these types of eyeshadows the best. Sort of tap and drag the gold, shimmery eyeshadow over the mobile lid and up on your inner corner. This will help open up your eyes, make them pop, and look a bit bigger. This is a very good trick if your eyes are closely set to your nose.
5. Apply eyeshadow to the lower lash line
To my lower lash line, I’m applying another pink color.

Then going over 1/3rd of it with a purple color.
6. Blend
Blend out the edges.
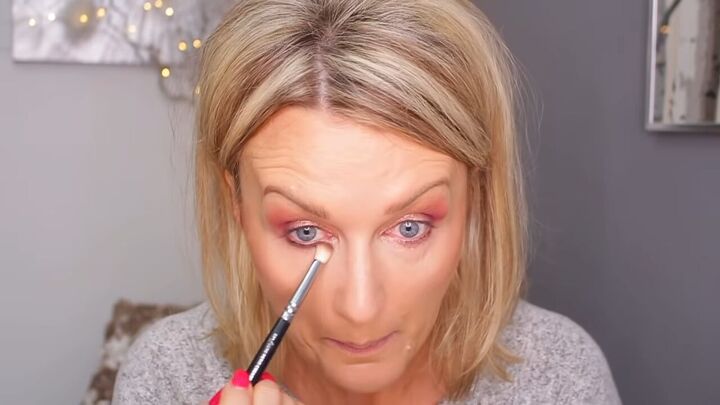
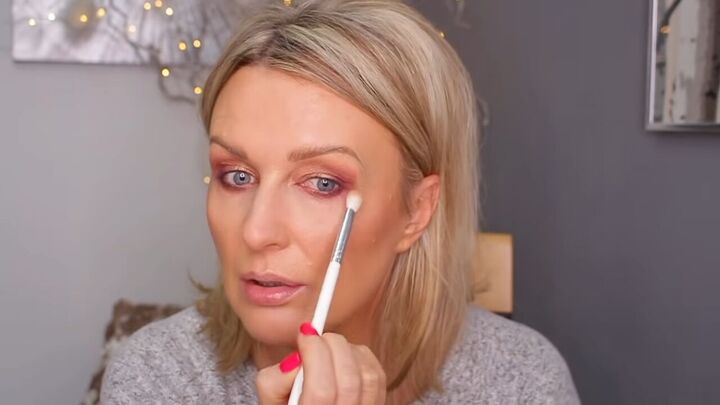
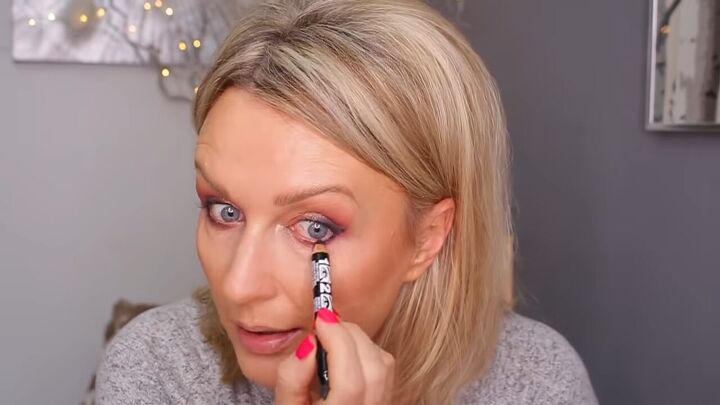
7. Apply eyeshadow to the inner corner
I’m applying another highlighting shade to my inner corners.

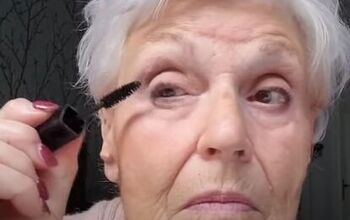
8. Apply eyeliner
Now, I’m taking a kohl eyeliner and putting a small line halfway across my lid then smudging it.
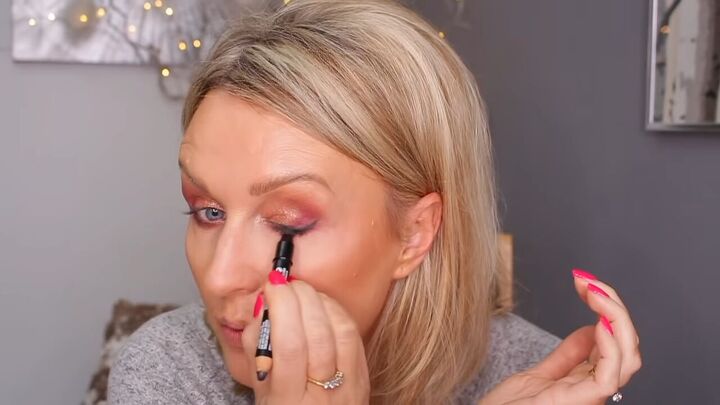
When smudging, I like to wing it out a bit so you get a shading effect but you don’t have to be that precise. With hooded eyes, it’s very difficult to do a winged liner with a liquid eyeliner. But when learning how to do eye makeup for hooded eyes, this is a good alternative trick.
I also put a tiny bit on my bottom lashes.
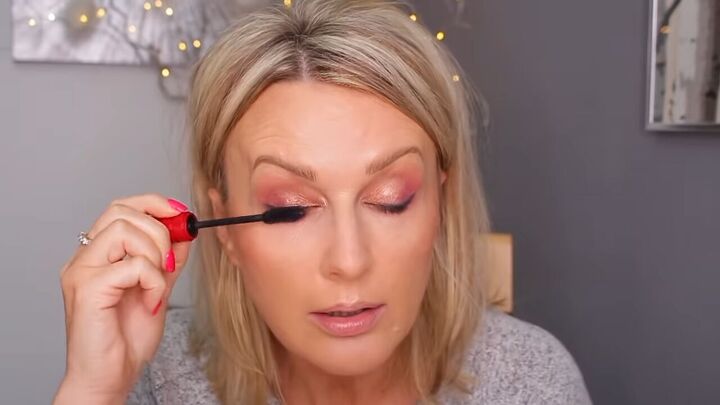
9. Apply mascara
I’m applying mascara for some drama. You can use false lashes, but I can’t be bothered.
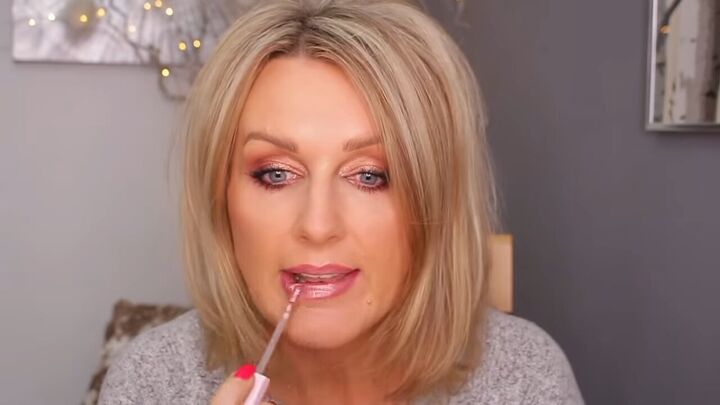
10. Apply lip pencil and gloss
For my lips, I’m going to use a lip pencil to line my lips and then smudge it with my finger. Then, I’m just going to apply a gloss over it.

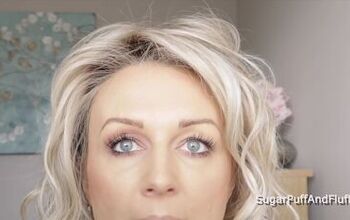
Step-by-step makeup for older hooded eyes tutorial
Here’s the finished look! I really like the colors I used. Let me know what you think about this hooded eyes makeup tutorial and how it worked out for you!
Products used:
Eyeshadow - Too Faced Natural Lust Palette
Mascara - Nars Climax Mascara
Lip gloss - Too Faced Gloss- Raising the Roof
Foundation - The Ordinary Serum Foundation
The author may collect a small share of sales from the links on this page.


Comments
Join the conversation
Beautiful! Thank you!
Looks great but too many steps for me