How to Apply Makeup at 50: Try This Easy but Super Glamorous Look

When Sue looked in the mirror after her birthday makeover, she actually burst into tears of joy — and that moment reminded me exactly why I do this.
If you’ve been searching for how to apply makeup at 50, this is less about which products to buy and more about the small, intentional techniques that help us look like our best, most confident selves.
We’ll walk step by step through the exact look I created for Sue’s 50th birthday party, from gentle skin prep to the finishing touches, so you can recreate a glamorous yet achievable style for yourself.
Tools and materials:
- Hydrating serum
- Moisturizer
- Primer
- Foundation
- Concealer
- Setting powder
- Contour
- Highlight
- Eyeshadow
- Eyeliner
- Mascara
- False lashes
- Brow products
- Lip liner
- Lipstick,
- Lip gloss
- Blush
- Setting spray
- Makeup brushes

1. Skin prep
Sue has dry skin, so I focused on hydration. I started with a lightweight serum to deeply quench the skin, then added moisturizer to lock it in and create a smooth base.
The two together give a plump, hydrated canvas that makes makeup apply and last much better.

2. Eyes
To begin, I applied an eye base to prevent creasing and ensure the shadows stayed vibrant throughout the evening.
I also used a little trick: placing a small strip of tape from the outer corner of the eye toward the temple. This created a lifted effect and made blending easier and faster while still leaving a very polished result.

After prepping the lids with concealer and a light dusting of powder, I layered soft neutral shades through the crease and outer corner, building dimension gradually from lighter tones to deeper ones.

A darker shade was smoked along the tape to frame out a wing, and finally, a luminous liquid shadow was tapped onto the center of the lids for a glowing finish.
Removing the tape revealed a crisp, clean shape that instantly lifted the eyes.

3. Foundation
For the base, I chose a long-wearing foundation with fuller coverage, starting in the center of the face and blending outward for an even look.
I brought it down onto the neck and chest for a seamless finish, then pressed it in with a damp sponge to keep the foundation natural and skin-like.

4. Contour and highlight
Sue has more of a square face shape, so my goal was to soften the angles. I contoured along the sides of her forehead and under the cheekbones, and I added definition along the jawline to give a tighter appearance.
Since she recently lost weight, I was mindful of areas where skin can appear less firm and used subtle shading to lift and draw attention upward.

For highlight, I brightened the inner corners of her eyes, lifted the outer corners, and added light through the center of the forehead.
I also contoured her nose with soft lines along the sides and a touch of light down the bridge, creating the illusion of a more lifted shape.

5. Under eyes
To balance the top of the eye look, I softly smoked out the lower lash line with mid-toned browns, connecting it to the wing created earlier.
I kept the shades softer under the eyes since this tends to look fresher and more flattering, especially on mature skin, while still giving that sultry, smoky effect.

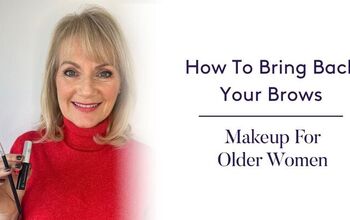
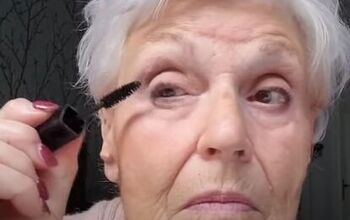
6. Lashes and brows
For the lashes, instead of using a full strip, I applied lighter lashes just on the outer corners. This enhanced the elongated shape of the shadow without overpowering it.

Sue prefers her brows natural, so I respected that and only added very soft definition with a pencil and light brow gel.
This gave structure and balance to the eyes while keeping them in line with her personal style.

7. Lips
For the lips, I shaped them with a natural nude-pink liner. Instead of emphasizing the peaks of her cupid’s bow, I rounded the top slightly and overlined just the center of the lips.
This technique gave her a fuller, softer look that instantly felt more youthful. I then filled in with lipstick and finished with a touch of gloss for dimension.

8. Blush
For blush, I chose a radiant shade and applied it along the cheekbones to add lift and warmth. I also swept a bit through the eye crease with a fluffy brush, repeating the color subtly to create harmony between the eyes and cheeks.
To finish, I set the makeup with a fine mist, which locked everything in place, softened any powdery texture, and left the skin looking fresh, natural, and beautifully finished.

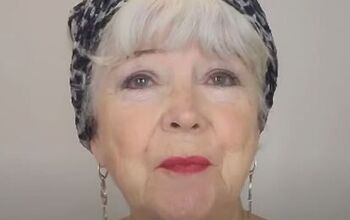
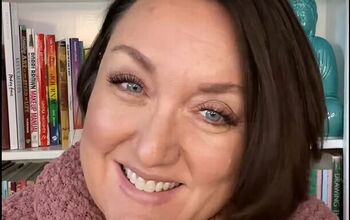
The transformation
The before-and-after transformation was incredible.

How to apply makeup at 50
Sue looked radiant, confident, and glowing, and it was such a joy to celebrate this milestone birthday with her and help her feel truly beautiful.
Will you be trying this makeup look on yourself? Comment down below.
Next up, 7 Mature Makeup Struggles Solved.
The author may collect a small share of sales from the links on this page.


Comments
Join the conversation