How to Add Volume to Your Hair: 5 Easy Tips

Achieving fuller, more voluminous hair isn’t about having thicker strands; it’s about using the right cut, prep, and styling techniques.
This tutorial on how to add volume to your hair will walk you through the full process, step by step, so you can create a natural-looking lift that lasts all day.
Tools and materials:
- Volumizing shampoo
- Lightweight conditioner (for mid-lengths and ends only)
- Scalp scrub or clarifying shampoo (optional, weekly)
- Root-lifting spray or mousse
- Volumizing mousse for mids/ends (optional)
- Lightweight heat protectant spray
- Blow dryer with a nozzle
- Round brush or blow-dry brush
- Velcro rollers or clips (optional)
- Texture spray
- Volume powder (optional)
- Volume-building root tool (optional)

Upstyle Recommends!
1. Get the right haircut
Your haircut determines how much volume is even possible. Fine hair looks fullest when the baseline (the bottom edge of the cut) is strong and blunt.
A blunt bob creates an instant illusion of density. An angled lob gives a lifted crown and softer face-framing while keeping the bottom thick.

If you prefer layers, keep them minimal: soft crown layers or light face-framing only.
Tell your stylist: “I want a strong perimeter with very soft, minimal layers for light movement — no thinning and no heavy texturizing.”

2. Prep your hair properly in the shower
Volume begins before styling. Heavy products weigh fine hair down before you even start blow-drying.
Use a volumizing shampoo that cleans without coating the roots. Use conditioner only on mid-lengths and ends. And add a weekly clarifying shampoo or scalp scrub to remove invisible build-up.

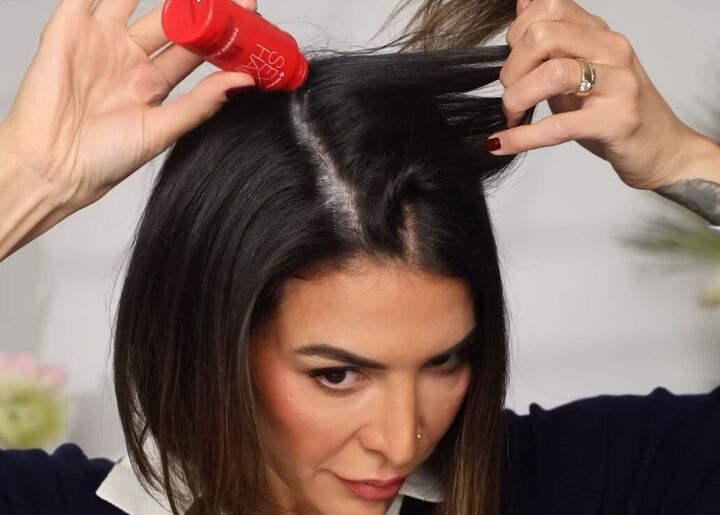
3. Apply volume-building products correctly
How and where you apply products determines how much lift you’ll get.
After towel-drying, apply a root-lifting spray or mousse from temples upward, section by section.
Apply a volumizing mousse through mids and ends if you want extra fullness. Then, mist a lightweight heat protectant over everything.

4. Blow-dry with intentional root lift
This is where most of the volume is created.
Section your hair and work from the bottom up. Lift each section at least 45° away from your head as you brush and dry. Pulling hair downward flattens the root.
Once a section is completely dry, keep it lifted while it cools: clip it, wrap it on a Velcro roller, or use the blow dryer’s cool shot.
Cooling in an upright position “sets” the volume so it won’t collapse an hour later.

5. Build volume where it flatters you most
Placement matters as much as height. For most people, the most flattering volume sits at the crown and upper sides.
If you have a longer face, add more volume at the sides (temples, cheekbones) and less at the crown to keep proportions balanced.
Check the balance by taking a quick photo from the front and side. You’ll see immediately if the lift is uneven.

6. Lock in lift without weighing hair down
Fine hair collapses fast when heavy hairsprays are used.
Choose a texture spray instead of strong-hold hairspray. Mist it from underneath at the roots and mids, then lift with your fingers.
For extra staying power, tap volume powder along your part or crown. Massage it in to activate instant lift.

For maximum longevity, use a root-volume tool under your top layer to create micro-crimps that act as hidden scaffolding. The lift lasts until your next wash.

How to add volume to your hair
With the right cut, clean prep, lifted blow-drying technique, and lightweight finishing products, even the finest hair can look naturally full and voluminous.
Use these steps together to add volume to your hair, with long-lasting height, shape, and fullness that complements your features.
I’d love to hear if these tips help you with your hair volume, so please leave a comment to let me know!
The author may collect a small share of sales from the links on this page.


Comments
Join the conversation