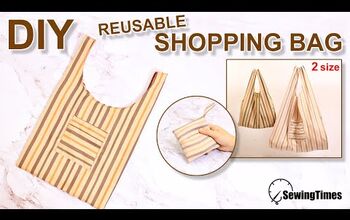
Tote Bag DIY Tutorial: How to Make a Reusable Shopping Bag

A common question I’m asked is how to make a reusable shopping bag that you can keep in your purse.
I enjoy creating DIY tote bag designs and this is the quickest and easiest method I know.
As a bonus, this bag folds up into its own attached pocket so you can take it anywhere.
Tools and materials:
- Scrap fabric for pocket
- Medium weight fabric
- Snap buttons
- Snap button tool
- Tumbler
- Fabric marker
- Ruler
- Scissors
- Pinking shears
- Pins
- Iron
- Sewing machine

1. Make the pocket
Cut two rectangles of scrap fabric, 5 inches (12.5 cm) wide by 8 inches (20 cm) long.
Fold the pieces in half lengthways and use a tumbler to cut one corner into a curve.

Open out the fabric and place the pieces right sides together.
Sew together around all the edges, leaving a small opening on one long side.

Trim with pinking shears to stop the fabric from fraying.
Turn the pocket right side out through the opening and push out the corners.
Press the seams flat.

2. Attach the pocket
Cut two 16 inch (40 cm) squares from the main bag fabric.
Separate the pieces and mark the center of one edge with a pin.

Fold the pocket in half lengthways.
Place the pocket on the right side of one bag piece, with the short straight edge of the pocket 3 inches (7.5 cm) from the pinned edge and the fold in line with the pin.

Open the pocket flat.
Draw a straight line across the pocket 2.5 inches (6.4 cm) from the curved end.

Topstitch the pocket to the bag around the three straight edges.

Fold the curved edge down at the line to make a flap.

3. Assemble the bag
Place the two bag pieces together with the wrong sides facing.
Sew together around the side and lower edges, taking a quarter inch (0.5 cm) seam allowance.
Turn the bag wrong side out and press the seams.

Sew the side and lower seams again on this side, taking a half inch (1 cm) seam allowance to make a French seam.

Turn the bottom edge of the bag up by 2 inches (5 cm) on each side.

Pin and sew in place at the side seams following the existing stitch line.

4. Finish the top edge
Turn the bag right side out.
Fold in the upper edge by a half inch (1 cm) all around and press it in place.

Turn the upper edge in by a further 1 inch (2.5 cm) and press again.

Fold the bag in half lengthways and mark the center of both top edges with pins.

5. Make the handles
Cut two strips of fabric each 28 inches (71 cm) long by 3 inches (7.5 cm) wide.
Fold each strip in half lengthways with the wrong sides inside and press the fold.
Open out the strips, press both long edges to the center and press in place.
Fold the strips in half lengthways again and press.
Top stitch both long edges.

6. Attach the handles
Place pins 3 inches (7.5 cm) either side of the center pins on each top edge.

Tuck the open ends of one handle under one side of the top edge of the bag at the outer pins.

Fold the handle up towards the edge and pin it in place.

Repeat with the second handle on the other side.
Sew two rows of topstitching around the top edge of the bag.

7. Fold the bag
Lay the bag flat with the pocket side underneath.
Fold one side of the bag towards the center, lining up the side seam with the second inner edge of the handle.

Fold the other side of the bag over the first.
To make it easier to fit into the pocket, turn this second edge back by an inch (2.5 cm) or so, so there’s less bulk at the side.

Fold the handles down over the center of the bag.

Turn the bottom edges of the bag up over the end of the handles.

Fold the top edges down below the level of the pocket opening.

Fold the bag in half again.
Attach snap buttons inside the pocket tab and on the outer top pocket edge.


How to make a reusable shopping bag
The finished tote bag DIY is easy to unroll and is ready for use in seconds.
You can tuck into the smallest purse so it’s always there when you need an extra bag.
Please leave me a comment and let me know if you like my DIY tote bag ideas and want to see more of them.
The author may collect a small share of sales from the links on this page.


Comments
Join the conversation