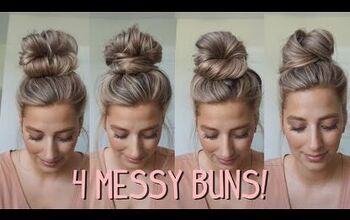
Easy New Ways to Do Your Messy Buns

The messy bun hairstyle can look completely different when you change the way you build the bun.
In this guide, I demonstrate a simple method that you can place low, in the middle or high on your head. Follow along and adopt these bun methods for yourself!
Upstyle Recommends!
Tools and materials:
- Hair elastic
- Bobby pins, spin pins or French pin
1. Start by preparing the hair
Begin by leaving some hair out in the front and pulling the rest back into a low ponytail. Let’s start low first, and later we’ll try the same technique in the middle and at the top of the head.

You can choose how you want to secure the bun, because several options work well.

These include using a French pin, a bobby pin or small spin pins. For this demonstration, I’ll mostly use bobby pins.

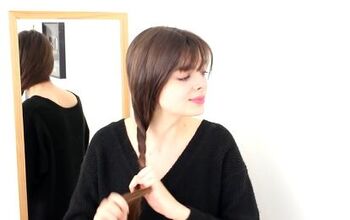
2. Create a three-strand braid
Next, braid the ponytail. If braiding in the back feels difficult, simply bring the hair to the side, which works just fine. Once you understand the positioning, the braid becomes easy to manage.

3. Form the bun with the braid
After finishing the braid, pinch the ends with one hand and open the hair elastic with the other. Slide your fingers under the elastic so you can pull the ends through easily.

Then turn the braid and shape it into a loop.

Fold each side of that loop inward while tucking the ends inside.

After that, flip the bun upward so the ends sit neatly inside.

4. Secure the bun
With one hand holding the bun in place, grab your bobby pins and secure it. Insert one pin on each side to hold everything together. Hook the pin in with the ridges facing down and press it into place.

Once the bun feels secure, lightly pinch and pull parts of the bun to even it out and adjust the shape.

Is this not so chic?!

5. Try the bun in different positions
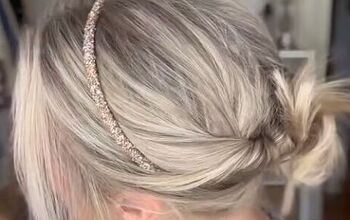
As I mentioned earlier, you can wear this bun low, at the nape of the neck. Alternatively, you can use the same process in the middle of the head.

The top version also works, but it is probably my least favorite and may require more bobby pins if you want it to look just right.

6. Use the two-strand twist method
Let’s try out another version using a two-strand twist instead of a braid. Again, we'll start with a ponytail but then split the hair into two sections.

Twist the sections together. Keep the twist simple rather than turning it into a rope braid. Once you finish twisting, we'll repeat the same steps as before.

7. Shape and pin the twisted bun
Pinch the ends, slide your fingers through the hair tie and pull the ends through.

Then fold the twist inward, tuck in any loose ends and flip the bun upward.

After shaping it, pin it in place using whichever tool you prefer, (spin pin, French pin or bobby pin).

Finally, adjust the bun by gently pinching and pulling it until it looks the way you want.

8. Test the twist in multiple placements
I tried the twisted bun on the side first because it feels easier.

Then I placed it in the center of the head, which I ended up liking because it sits not too low and not too high.

After that, I tried it again at the very top of the head.

Now that you’ve learned several ways to create a messy bun hairstyle, let me know in the comments which method you liked the best. And for more hair inspiration, check out these cute braid hairstyles that are throwbacks to 2016.
The author may collect a small share of sales from the links on this page.


Comments
Join the conversation