Got Long Hair? Try This Easy Messy Bun Hairstyle

If you’re looking for an easy messy bun hairstyle for long hair that takes only minutes but still looks stylish, this step-by-step guide is perfect for you.
With just a few simple twists, ties, and pulls, you can create a soft, effortless bun that works for everyday wear or when you’re rushing out the door.
Tools and materials:
- Hairbrush or comb
- Clear hair elastics
- Bobby pins
- Curling tool or method (optional, such as heatless curls)
1. Start with face-framing pieces
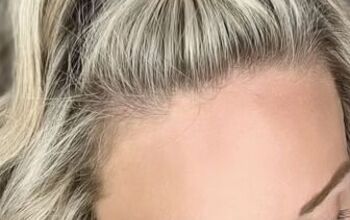
Begin by leaving a few pieces of hair out at the front to frame your face. This softens the look and gives the hairstyle a relaxed feel. The rest of your hair should be smoothed back with your hands or a brush to keep it neat while still casual.

Upstyle Recommends!
2. Gather hair into a bun with a tail
Pull the rest of your hair back into a ponytail. If your hair is curled, especially with heatless curls like sock curls, it adds extra texture and volume to the final bun. Secure your ponytail with a clear hair elastic.

When wrapping your hair tie around the ponytail for the last time, only pull the hair halfway through. This forms a small, loose loop or “half bun.” Let the ends hang out naturally; they’ll be used in the next step.

3. Make two topsy tails
Take the loose ends hanging from your bun and divide them into two even sections. Smooth each section with your fingers to remove frizz or flyaways. For each section, tie another small elastic near the ends.

Create a small opening just above the elastic and flip the ends up and through the opening. This is called a topsytail.

Repeat the same process on the other section so you end up with two topsytails.

4. Wrap and secure the bun
Take one topsytail and twist it either left or right, both work fine.

Then, pull your half bun through the opening of that twisted section.

Tighten the ends in the front.

Repeat with the other topsytail, twisting and pulling the bun through once again. This adds dimension and secures the bun in place.

5. Adjust and tighten
After both sections are wrapped, gently tighten the ends by pulling them. Check the back of your bun to make sure it’s fully pulled through and centered.
If your hair is shorter, you might have a few stray ends. Don’t worry, this adds to the casual look.

Fan out the bun to the sides if the shape looks a bit funky. I always recommend to pinch and pull your hairstyles as this always seems to make it look better.

I’m also going to stretch the back. If you overstretch this, you can always go back to the front and tuck it in.

6. Pin and shape
Use bobby pins to secure any loose or short ends that stick out awkwardly. Pin them toward the center of the bun to keep the shape neat while maintaining the messy texture.

7. Stretch for volume and apply hairspray
Gently pinch and pull sections of your bun and the hair around your crown. This “stretching” technique makes the hairstyle look fuller and more effortless.

Add some hairspray for extra hold.

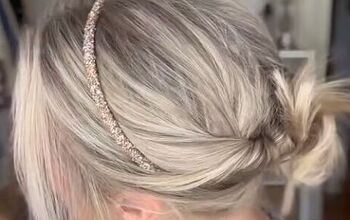
Here’s how it looks at this point:

8. Deconstruct for a messy finish
For that perfect messy bun finish, lightly pull out a few extra strands around your face and the sides.
Just a few pieces can give the right amount of undone charm. If you pull out too much, tuck it back under the bun with a bobby pin.

9. Final touches
You can curl a few of the loose strands at the back to complete the deconstructed look. Adjust the bun until it feels comfortable and balanced.

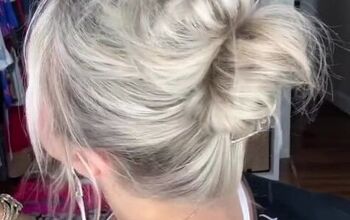
Once you’re happy with it, you’re ready to go, without overthinking it! Here’s the deconstructed version:


Easy messy bun hairstyle
This easy messy bun hairstyle for long hair takes just a couple of minutes to create and looks effortlessly chic every time.
Whether you’re heading out for errands or a casual meet-up, it’s the perfect go-to look that’s stylish without trying too hard.
Let me know what you think about this messy bun hairstyle in the comments below! Then check out how to look good without makeup in 6 easy steps.
The author may collect a small share of sales from the links on this page.





















Comments
Join the conversation