3 Quick & Easy Bra Makeovers to Make Your Underwear More Beautiful

Have you ever thought of using bras as a fashion statement? Follow this tutorial and learn 3 bra makeovers that do just that! Even if we’re the only ones who see our bras, we know what it looks and feels like, and a beautiful bra makes us feel stronger and more confident. Ready for your bra makeover? Let’s begin.
Upstyle Recommends!
Want to save?
Get your 30-day free trial of Amazon Prime today before the biggest sales of the year start July 16th-17th!
Tools and materials:
- 1 lace-trimmed bra
- 1 bold-colored untrimmed bra
- 1 white underwire bra
- Scrap fabric
- Scrap lace
- Small beads or sparkles
- Fabric glue
- Sewing pins
- Scissors
- Thread
- Sewing machine
Upstyle Recommends!
1. Bra into bralette
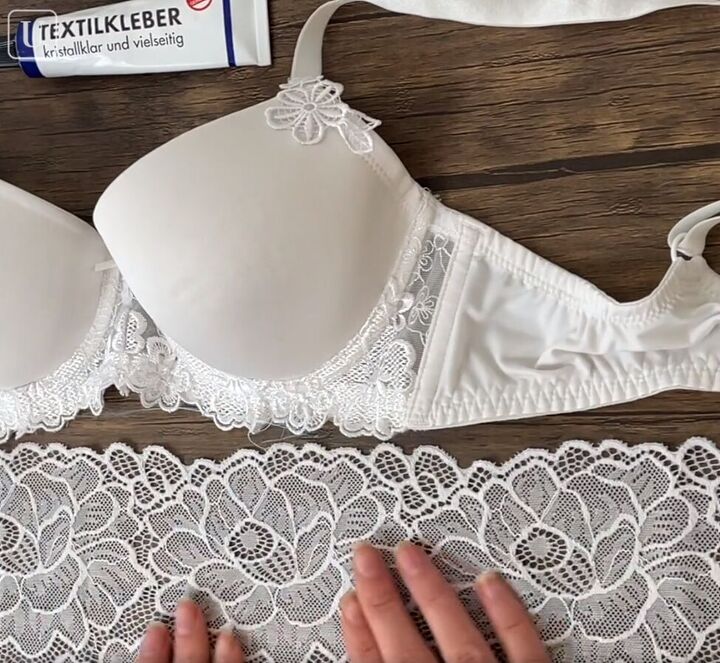
For this bra makeover you are going to glue a bra with lace trim onto a piece of lace. Apply fabric glue to the inside of the bottom bra band and attach it to the top edge of some lace.
Trim off the excess lace from the sides.
And you have a pretty camisole!
2. Plain to patterned bra
Pair a bold-colored bra with some coordinating scrap fabric.
Mark 1½ centimeters (0.59 inches) on the side panel of the bra, from the bra end.
Cut the side panels of your bra at those marks.
Trace the outline of the cut-off side panel onto the back of your fabric, adding a 1-inch seam allowance. Cut out the tracing.
With the right sides together, pin the bra side panel to the fabric and sew along the seam allowance line on three sides, leaving the shortest side open, making sure the bra is getting sewn onto the fabric.
Turn the side panels right side out and fold in the open edge so that the bra closure sticks out. Then sew that open edge closed, attaching it to the bra.
Attach the wider ends of the side panels to the sides of the bra and sew in place. And now your plain bra has been taken up a notch.
3. DIY bedazzled bra
Use a plain white underwire bra for this bra makeover. Apply fabric glue above the underwires.
Then attach beads or sparkles to the bra.
Continue gluing and adding beads until the whole bra cup is covered. And now you have a beautifully bedazzled bra to add to your collection of upstyled bras!
DIY bra makeovers
I hope you give these fun bra makeovers a try. If you do, please let me know in the comments which bra makeover you liked the best, and if you’ve come up with any bra makeover ideas of your own.
Enjoyed the project?
Suggested materials:
- 1 lace-trimmed bra
- 1 bold-colored untrimmed bra
- 1 white underwire bra
- Scrap fabric
- Scrap lace
- Small beads or sparkles
- Fabric glue
- Sewing pins
- Scissors
- Thread
- Sewing machine
The author may collect a small share of sales from the links on this page.


Comments
Join the conversation
Adding beads, sparkle or whatever will not last a washing…..even by hand.
I don't think people toss bras for cosmetic reasons. I discard mine when they are stretched out, or hooks are broken or missing, or they are just old and perspiration stained and no longer fit well. Bedazzling old bras wouldn't make me want to keep them...it would just make them even less comfortable