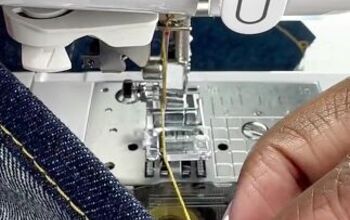
Check Out This Easy Tutorial on Hemming Jeans With Original Hem

When you shorten a pair of jeans, it’s almost impossible to replicate the look of the original industrial machine hem on a domestic sewing machine.
Here’s an easy way of hemming jeans with the original hem so you keep that cool distressed look.
If you can, use a special needle for jeans or leather to make the sewing easier. I used a size 14 denim needle for this project.
Tools and materials:
- Jeans with original hem
- Ruler
- Fabric marker
- Seam ripper
- Scissors
- Pins
- Size 14 Jeans needle
- Matching thread
- Contrast thread
- Sewing machine
1. Measure and cut
Measure the amount you need to shorten the jeans by.
Leaving a half inch (1 cm) seam allowance above the original hem, mark the amount you want to remove by drawing two parallel lines across the leg.
Cut along both lines and use the excess fabric as a template for the other leg.
2. Open the hem
Use a seam ripper to cut through the contrast stitching at the bottom of the original hem.
Continue around the hemline until the top row of stitches has been completely removed.
3. Reattach the hem
Turn the opened hem wrong side out.
With the jeans right side out, tuck the end of the jeans inside the hem so the right sides are together.
Line up the side seams carefully.
Pin the raw edges together.
Using a matching thread, sew the two pieces together along the original stitching line.
When you get to the outer leg seams, use your seam ripper to open the stitching on the original hem from the stitching line to the bottom of the hem.
Cut away the excess fabric on the wider side of the seam allowance to reduce bulk and continue sewing around the leg.
4. Prepare for final stitching
Cut away the seam allowance on the inner leg seam to the stitching line.
Trim the excess fabric above your sewing line to about 1/4 inch (0.5 cm).
5. Restitch the hem
Fold the reattached hem down.
Turn the free edge to the inside.
Wrap it over the raw edges.
Pin it in place, making sure the outer leg seams match as perfectly as you can.
Rethread your needle and bobbin with a contrast thread to match the rest of the jeans.
Sew carefully along the original stitching line.
Feed the bulk of the fabric through slowly when you get to the side seams, to keep the stitching even.
Repeat on the other leg.
How to hem jeans with the original hem
When you’ve finished, no one will be able to tell that you removed the original hem and reattached it.
You can use the same technique to shorten pants with turn-ups or sleeves with cuffs. With more lightweight fabrics, you can fold the excess fabric to the wrong side instead of cutting it away.
I’d love to know if you enjoyed learning how to hem jeans with the original hem and if this has been helpful to you. Please drop me a comment below with your thoughts.
For more helpful sewing tips and tricks, don’t forget to follow me on TikTok as well: https://www.tiktok.com/@tugbaisler
Enjoyed the project?
The author may collect a small share of sales from the links on this page.


Comments
Join the conversation